
As with anything in the IT sphere, there are multiple solutions to a problem, this is just one of many ways you can make use of the Raspberry PI as a kiosk to display the RFS Activ dashboard. This is a solution that works for our environment, it may not work for you or you may not agree with parts of this solution, please feel free to find a solution that is right for you.
TL;DR for those that want to jump right in and not go through the manual steps below, a simple BASH script has been created. All you need to do is download the script, extract it: tar -xvf RFS_Activ.tar.gz and run it as your default user with the command: . setup_RFS_activ_kiosk.sh (please note the fullstop before the file name!!)
It has been tested on the latest bullseye build of the OS and the older (Buster) Raspberry PI Desktop for PC version. It will perform the following steps:
* Install latest OS updates – yes – even for the older OS.
* Install the 4 tools used for the kiosk config: xdotool, unclutter, vim and sed.
* Change the SSH config to allow the root user to login and changes the port SSH listens on to 2929.
* Create 2 scripts – activ_start.service & activ_start.sh – these execute at startup and run Chromium.
* Create a file with Chromium flags to enable OpenGL graphics – used by maps on the dashboard.
* Create cron job for the root user to reboot each night at midnight.
* Starts the service activ_start.service and opens Chromium to the dashboard address.
As a note to everyone looking to use this script, recently changes have been noticed on the RFS Activ site. When browsing to the dashboard URL you are prompted for login credentials but upon login you are directed to the home screen instead of the dashboard.
This script will open Chromium and browse to https://activ.rfs.nsw.gov.au/webapp/home
* After 45 seconds it will send a keypress to the system (Tab key) – 2 seconds later it will send another keypress (Return key). This “clicks” the initial login button.
* After 12 seconds it will send another Tab key signal – this will give the username field of the login screen focus – 2 seconds later it will send another Return key signal – this will complete the login and take you to the RFS Activ home screen.
*After another 20 seconds it will then browse to the dashboard URL.
Once Chromium opens – do not touch the keyboard or mouse – if you change focus away from the “Login” button – the script will not work.
As you can see from the above steps – before running the setup script – you MUST log into the RFS Activ site FIRST and SAVE the username and password in Chromium on the raspberry PI. I would also point out at this stage to either disable UBlock Origin plug-in in Chromium or turn it off for the RFS Activ site. It will stop the dashboard from loading – there are images below showing how to do this.
Probably the best place to start is with a fresh install of Raspberry PI OS 32-bit. If you have already installed the OS on your Raspberry PI please skip to the next part.
You will need to download and install the latest version of the imager for your selected OS it can be found here: https://downloads.raspberrypi.org/imager/imager_latest.exe
Insert your microSD card into an SD adapter and plug it into a card reader, make sure your operating system acknowledges there is a new disk and it’s writable.
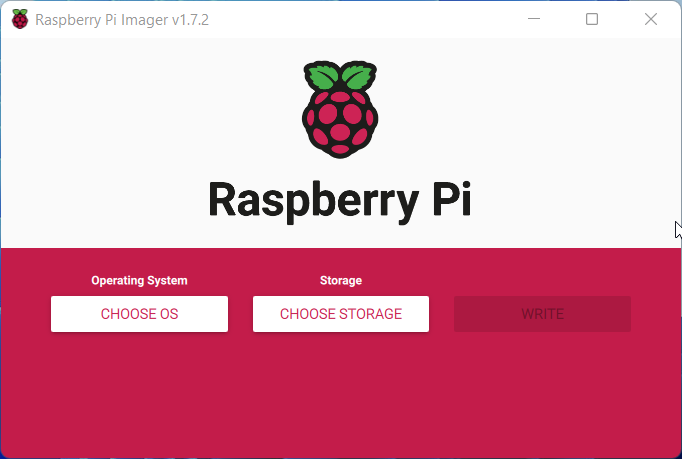
Open the imager application, you will be presented with a very simple interface with 3 steps – select the OS you want to install, select the location you want to install the OS, once you have selected the storage device a button will appear under the write button to enable you to pre-configure certain aspects of the OS – it is a good idea to do this as it saves time later on.
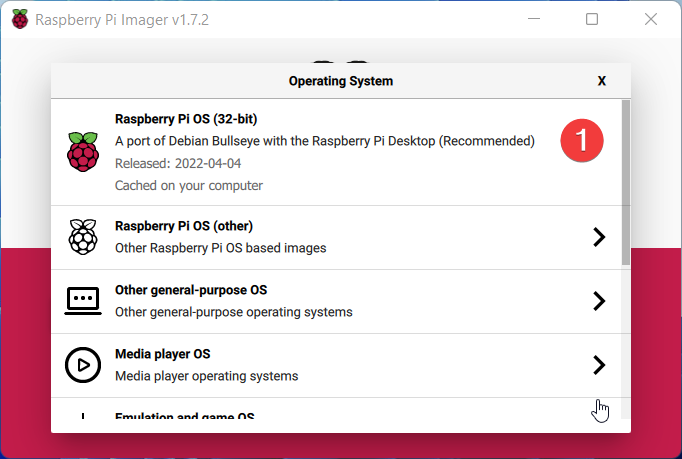
Click the “Choose OS” button and select Raspberry PI OS (32-bit)

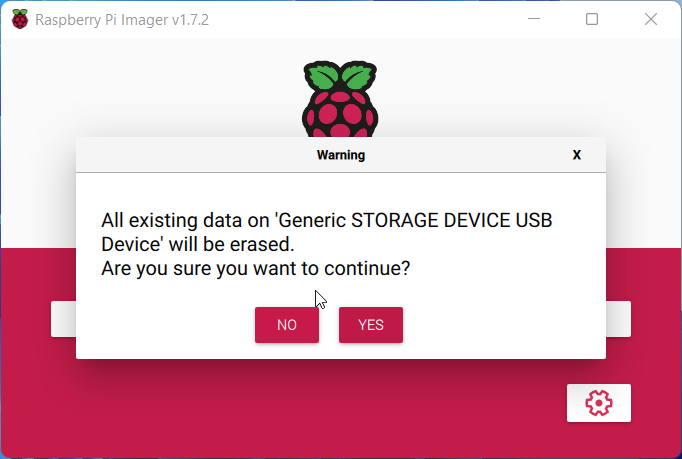
Click “Choose storage” button and select your SD card. You will be presented with this warning – select yes to continue – or this will be a very short lived “How to” exercise.
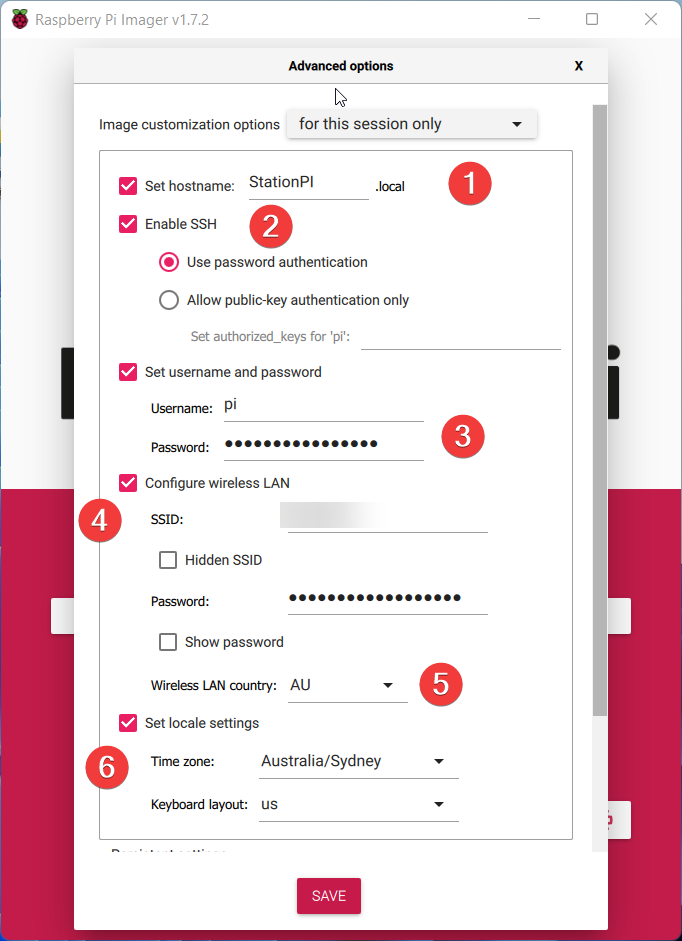
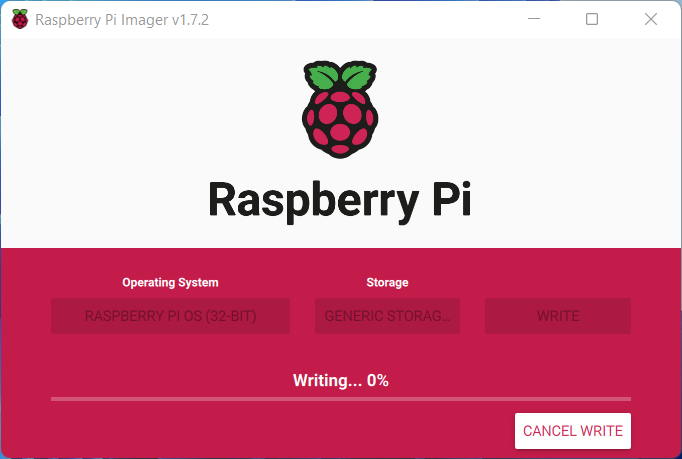
Now the storage option has been set – you will be presented with additional options – click the cog button and fill in the details from the screenshot above, using your details for passwords and SSIDs and click “Save”. You can now click on the “Write” button – this will configure the SD card with the Debian based Raspberry PI OS and the few options you’ve set. Go make your favourite hot beverage and wait for the write process to finish…
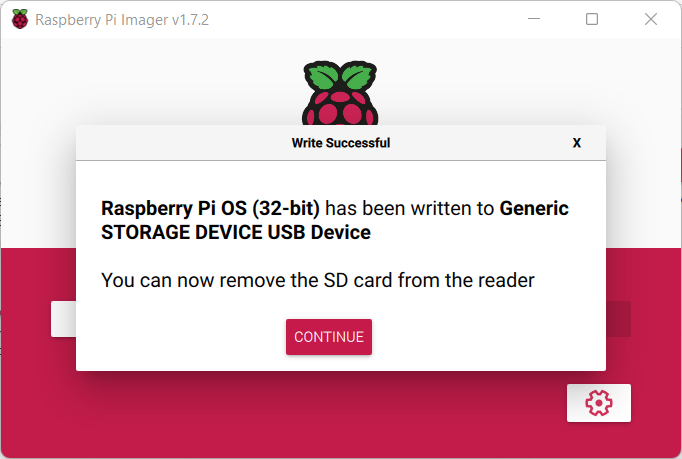
Once the write process has completed you can close the imager application and removed the SD card from the computer and insert it, carefully, into the Raspberry PI and boot it up – just as a side note for those who have never done this before – you may see the PI reboot multiple times to start with – don’t panic it will boot eventually.
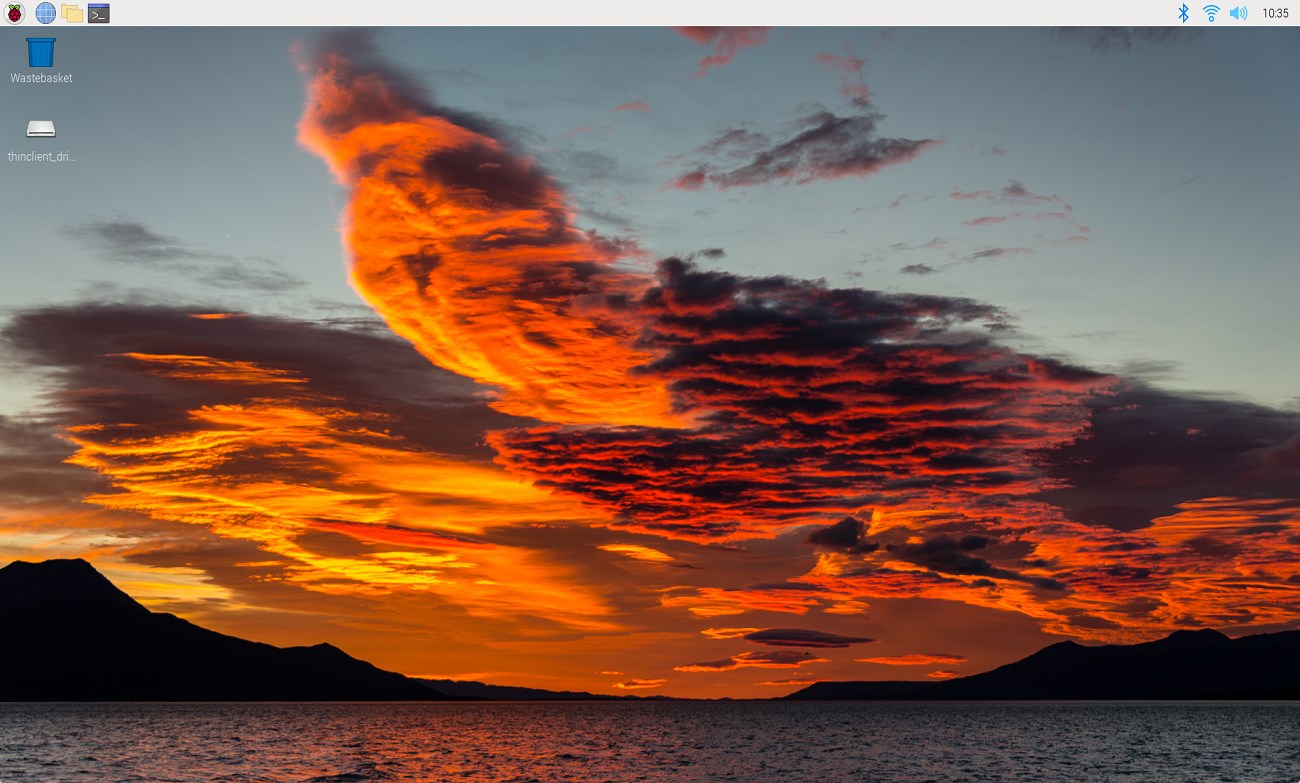
All going well – you should now be presented with a scenic image on the desktop – if you wanted to cheat you could now browse to this page on the Raspberry PI and copy and paste the commands into the terminal window. All commands you need to enter have been highlighted in bold. If the images on the page are too small – right click on them and select “open image in new tab”.
Click on the “Terminal” shortcut on the launch bar:
In the terminal window type in the following command and press enter to execute the command:
sudo passwd root
As you can see in the screen shot, when you run the command you are asked to enter a new password – please note when you type you will not see any characters appear on the screen.
Type in your desired root password and hit enter, you will then be asked to type the password a second time to confirm, again hit enter to confirm.
Now we will sign-in as root and do a little house keeping, so enter the following commands and as before hit enter after each command to execute it:
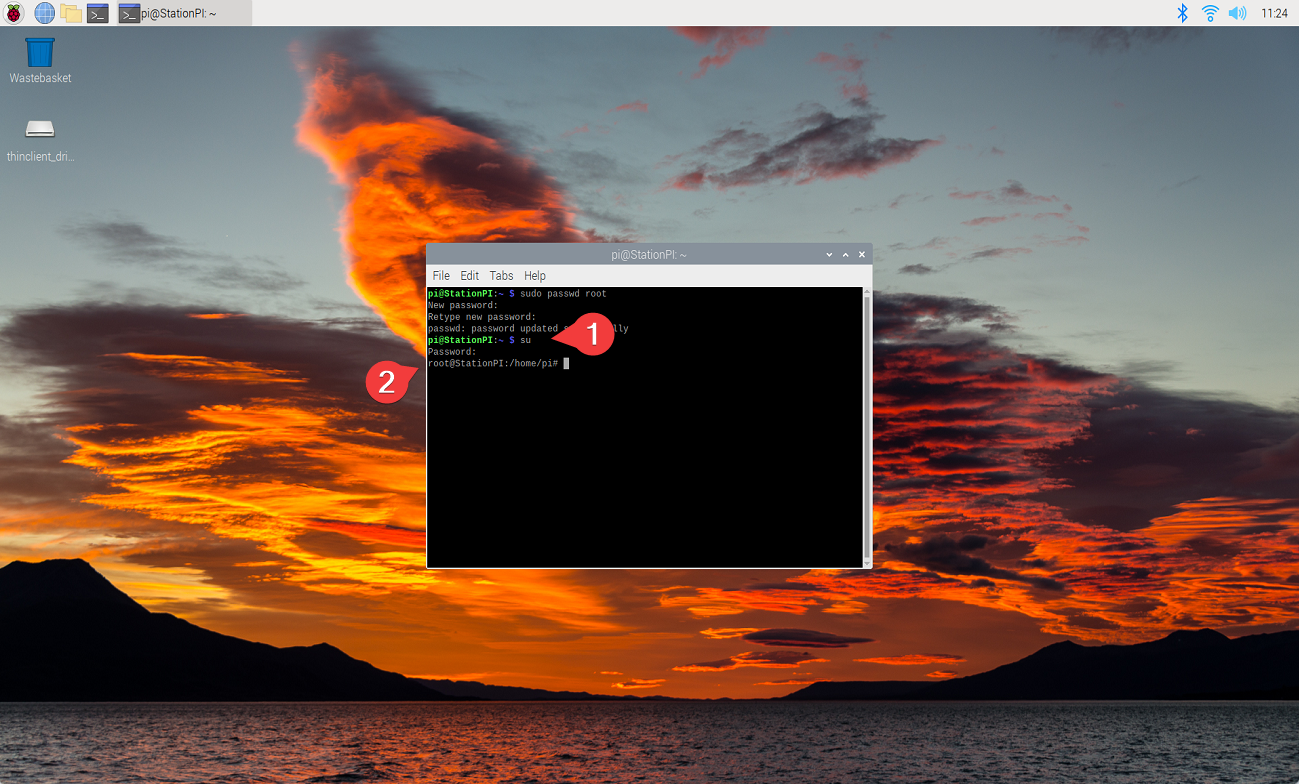
su
You will be prompted for the root password which you just set in the step above – again you will not see any characters on the screen when you type it in – hit enter to complete the command – if successful you will see the prompt change from pi@StationPI: to root@StationPI this shows you are now the root user (administrator).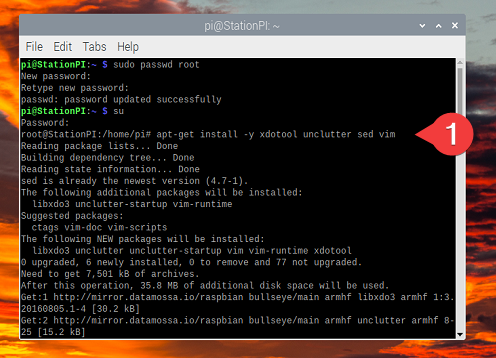
apt-get install -y xdotool unclutter sed vim
This will install the 4 applications we need to configure the PI to be used as a kiosk and login and display the dashboard on startup.
apt-get update
apt-get upgrade
These commands will update the Raspberry PI software to the latest versions it is a good idea to always keep the software up to date – just as in Windows.
This next step is not required to get the dashboard working however it will give you access to the PI using SSH if you ever need to get into device from another machine for whatever reason. Using your favourite text editor, if this is all new to you I would recommend nano over vi/vim, edit the file: /etc/ssh/sshd_config
Find the lines in the file and change to the following by deleting the #’s and editing the values:
Old value: #Port 22
New value: Port 2929
Old Value: #PermitRootLogin prohibit-password
New Value: PermitRootLogin yes
Old Value: #PasswordAuthentication yes
New Value: PasswordAuthentication yes
Save these changes and close the file. Please be very careful when making these changes – don’t change anything else in the file unless you know what it does.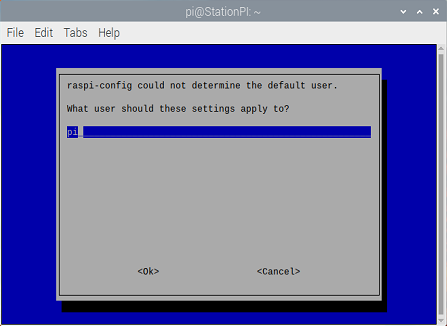
raspi-config
Once you’ve entered this command you will see the screen above – just hit enter to select the pi user.
Use the arrow, Tab, Esc and Enter keys to navigate through the menus. The settings needed in here are:
2. Display options:-
* You may need to toggle underscan on or off depending on the display you are using – if the icons are not fitting to the screen size turn this on.
* Disable screen blanking
6. Advanced Options
* GL Driver – enable
* Compositor – enable
* Glamor – enable
Once these changes have been made, use the Tab key to select “Finish” and reboot.
Once the Raspberry PI has rebooted, open the terminal window again and run the su command again to elevate to root access. The following command must be run as root – please note the single and double quotes – they MUST be entered as is:
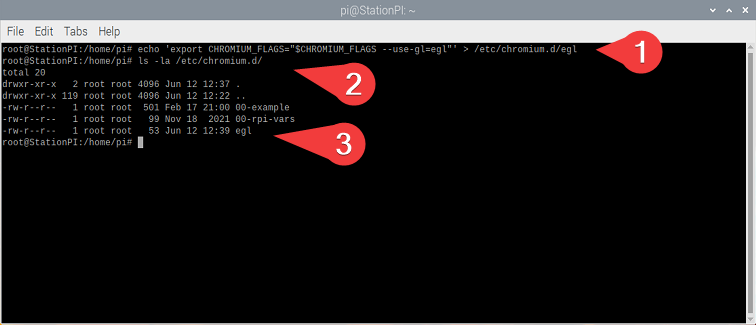
echo ‘export CHROMIUM_FLAGS=”$CHROMIUM_FLAGS –use-gl=egl”‘ > /etc/chromium.d/egl
ls -la /etc/chromium.d
The ls command will confirm if the file was created successfully or not – if you don’t see the file egl listed please make sure you used the su command before running the echo and that you had the single and double quotes in the correct places.
We are now at the point where we can open Chromium, make a few changes and browse to the dashboard and save the username and password details in the browser.
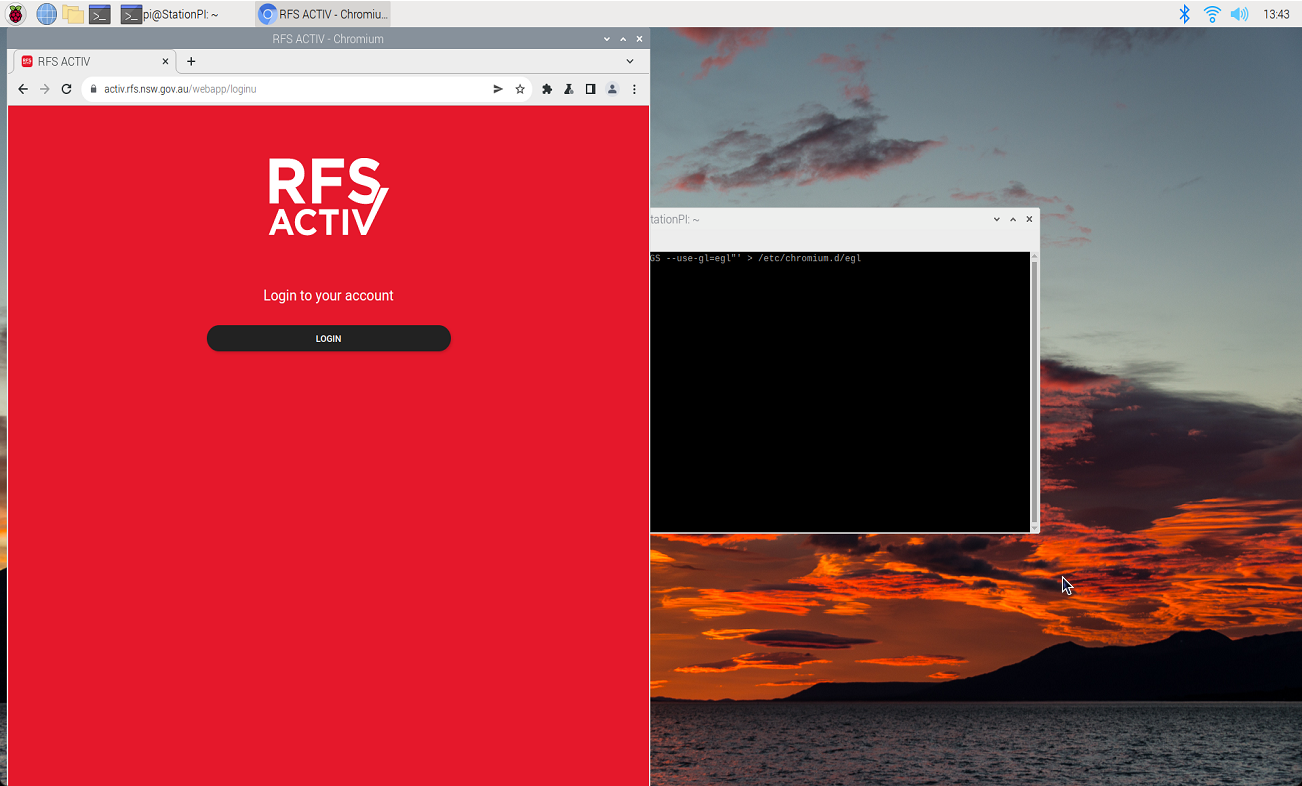
- Open Chromium
- Browse to the activ URL: https://activ.rfs.nsw.gov.au/webapp/dashboard
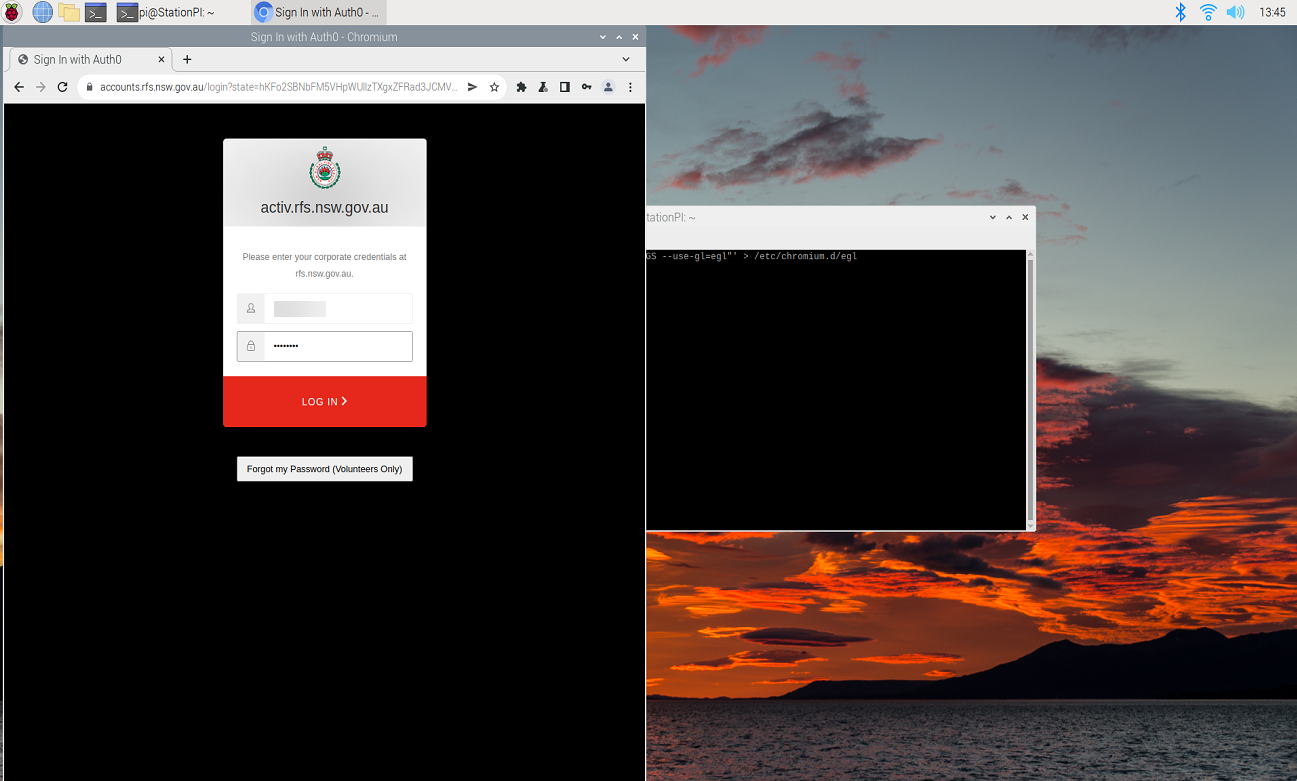
- Click the Log In button
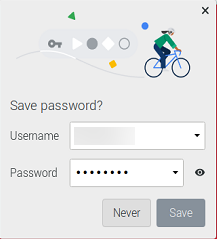
- Enter your username and password for your brigade and select “Save” details when the window pops up.
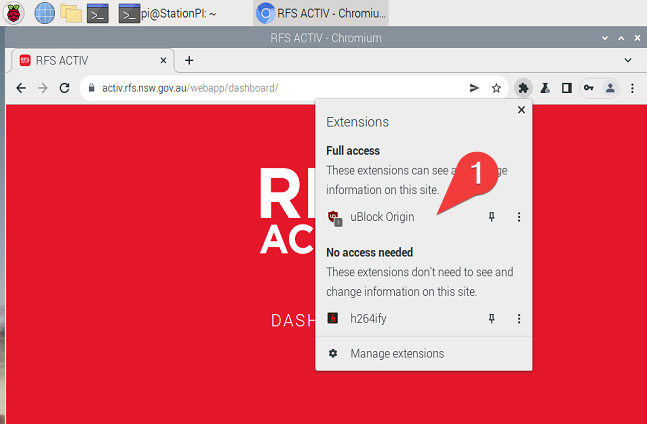
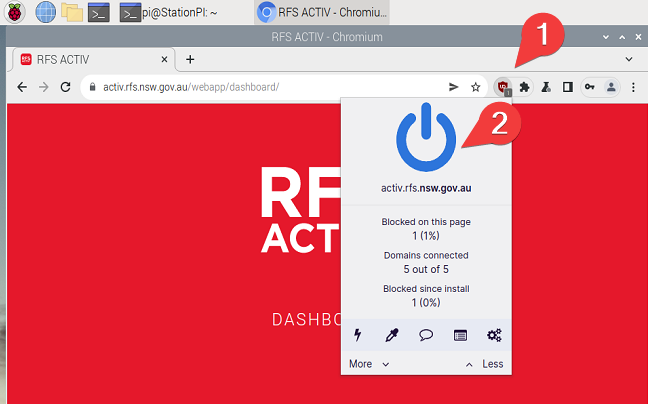
- Click on the extensions icon and click on the Ublock Origin extension
- When the Ublock Origin window pops open – hit the blue power icon in that window to disable Ublock for the dashboard site.
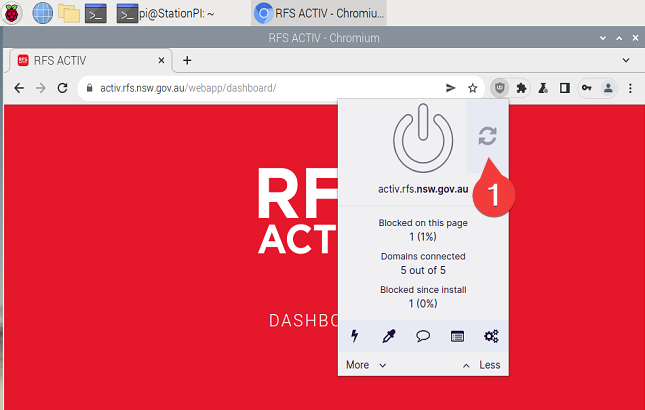
- Hit the refresh button that appears next to the power icon in the Ublock Origin window
- The dashboard will now able to load correctly in Chromium after a short delay to load all the components.
- If you make use of the weather radar and other plugins on the dashboard you may need to tweak the settings in Chromium:
Settings -> Security & Privacy -> Site Settings -> Additional Settings -> Insecure Content: either allow it or specify [*.]rfs.nsw.gov.au to be allowed to have insecure content.
Now Chromium is configured we will create two files, one is a script file that does all the work to open Chromium and get through the login pages. The second file is a service that runs on startup and calls the script to open Chromium.
The script:
activ_start.sh
#!/bin/bash

#functions
Dashboard () {
        URL=$1
        nohup /usr/bin/chromium-browser --kiosk $URL & disown $!;}

xset s noblank
xset s off
xset -dpms
unclutter -idle 0.5 -root &
sed -i 's/"exited_cleanly":false/"exited_cleanly":true/' /home/pi/.config/chromium/Default/Preferences
sed -i 's/"exit_type":"Crashed"/"exit_type":"Normal"/' /home/pi/.config/chromium/Default/Preferences
Dashboard "https://activ.rfs.nsw.gov.au/webapp/home"

sleep 30.0
xdotool key Tab
sleep 2.0
xdotool key Return
sleep 9.0
xdotool key Tab
sleep 2.0
xdotool key Return

sleep 20.0
Dashboard "https://activ.rfs.nsw.gov.au/webapp/dashboard/"

while :
do
echo "Stay in the loop to keep Chromium going" > /dev/null  2>&1
sleep 1
done
Select all the text above in the code window above and copy it, from the #! down to and including the word “done”, open the terminal screen on the PI and type the following command and hit enter:
nano activ_start.sh
Once nano opens navigate to the terminal window Edit menu and select paste. Once it is pasted in hit ctrl+o and Enter to save and ctrl+x to exit.
Now the file is created we will need to make the script executable – type the following command in the same terminal window:
chmod +x activ_start.sh
activ_startup.service
[Unit]
Description=Chromium Kiosk to run RFS Activ
Wants=graphical.target
After=graphical.target

[Service]
Environment=DISPLAY=:0.0
Environment=XAUTHORITY=/home/pi/.Xauthority
Type=simple
ExecStart=/bin/bash /home/pi/activ_start.sh
Restart=on-abort
User=pi
Group=pi

[Install]
WantedBy=graphical.target
Select the text above and copy it – in your terminal window use the su command to get root access:
su
To create the second file enter this command:
nano /lib/systemd/system/activ_startup.service
Paste in the content of the code window above and hit Ctrl+o and Enter to save the file then Ctrl+x to exit.
As with any computer, the Raspberry PI will need to be rebooted at least once a week, if not more, we can automate using a cronjob: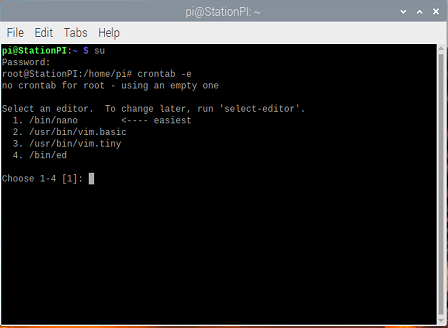
crontab -e
The first time you run this command you will be prompted to select a default editor – if you’re not familiar with any – select nano by hitting the Enter key. Navigate to the bottom of the file and enter the following text on the last line – this will schedule a restart each night at midnight:
0 0 * * * /usr/sbin/shutdown -r now
Ctrl+o and Enter to save the file and Ctrl+x to exit the editor, you will see a new crontab has been created: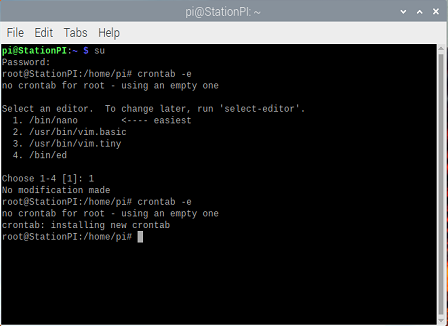
The last two commands we need to run are to enable the new service we’ve just created and to start it.
systemctl enable activ_startup.service
systemctl start activ_startup.service
The new service will start up and Chromium will execute in kiosk mode – it will browse to the login page for the dashboard. After a 30 second delay it will automatically login to the first screen and after a 9 second delay it will log into the second screen.